Coronet 3-D
Specification
| Manufacturer | : | Coronet |
|---|---|---|
| Produced | : | 1953 |
| Classification | : | Medium Format |
| Body Type | : | Solid Body Stereo |
| Construction | : | Bakelite |
| Film Type | : | 127 |
| Film Width | : | 46mm |
| Image Size | : | 2 x 1⅝" (5x4.3 cm) |
| No. of Images | : | 4 Stereo or 8 Single |
| Lens Type | : | 2 x Meniscus |
| Focal Length | : | 78mm |
| Focus Type | : | fixed |
| Focal Range | : | 9ft - Inf. |
| Aperture Type | : | Fixed |
| Apertures | : | f/18 |
| Shutter Type | : | Fixed Speed |
| Shutter Speeds | : | I*(1/50s) |
| Size (w x h x d) | : | 167 x 90 x 110 mm |
| Weight | : | 370g |
| * Measured on this camera | ||
Art Deco Credentials
![]()
![]()
Acceptable: Modest and restricted
- Produced after the main Art Deco period.
- Bakelite body with horizontal linear ribbing.
- Curvilinear body design.
- Chrome lens and viewfinder bezels.
Description
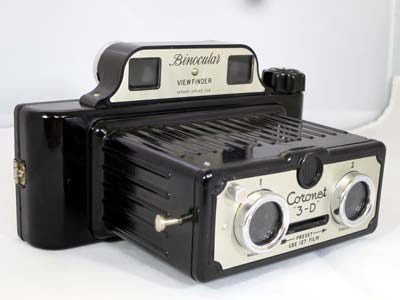
The "3-D" from Coronet is a stereo camera for taking pairs of photos on 127 film. The early version has a black body with speckles of colour with a Galilean and waist level viewfinder. This later model has binocular vision and is constructed with smooth or ribbed Bakelite. Eventually, the ability to attach a single shot flash bulb attachment was added, the connectors for which are on the left hand side.
The camera has two fixed focus meniscus lenses with a single shutter speed. It has a single-blade spring powered guillotine shutter which lets light into the two stereo compartments simultaneously.The shutter must be primed by sliding a lever on the face of the camera. The shutter is released using a plunger on the side of the camera. It has a binocular viewfinder to help compose your stereo images (see below). Film advance is by knob and controlled by viewing though the red window on the rear of the camera.
It is possible for the camera to take 4 stereo pairs. 8 single (non-stereo) images can be taken per roll by blocking one lens with a built-in internal metal cover, actuated by a small silver knob on the front. Some versions have a synchronized flash feature.
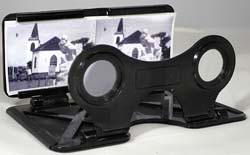
Stereo images can be viewed using a 3-D viewer.
How to Use
The User Manual is found here:- https://www.butkus.org/chinon/coronet_3d/coronet_3d.pdf
This camera takes 127 film which is still available from select outlets - search for 'Rera Pan 100-127' which is a black & white film. For those photographers in the UK, try Nick & Trick photographic services. If you want to use a particular type of film which is not available commercially, then you can cut your own 127 film from any 120 film. See my page on 'How to cut 127 film from 120 film'.
When taking stereo pairs, the film is advanced until an odd number shows in the red window (1, 3, 5, and 7). When taking eight single exposures, the blanking plate is swung over the number 1 lens. The film is advanced to show all numbers in the red window starting with 1 and ending with 8.
There is a curious thing about this camera that I have not be able to fathom. The distance between the two viewfinder bezels is 57mm. The average distance between the pupils of an adult is 62mm for female and 64mm for male. The distance between my pupils is 67mm. This makes it almost impossible the use the binocular viewfinder effectively. Was this camera designed for a child? It's interesting to note that the distance between the 3-D viewer lenses is 64mm.
With a shutter speed of only 1/50 sec, make sure you brace the camera against your face and press the shutter smoothly to avoid camera shake.
If you don't want to bother with an exposure meter, follow the guide shown. It is based on the 'Sunny 16' rule. Film is so forgiving and will produce acceptable results even when over-exposed by 2 or 3 stops or under-exposed by 1 stop.
The table shown assumes the shutter speed is about 1/50s.
The table also assumes that the sun is at least 30 degrees above the horizon - that's 10am - 5pm on a summers day in the UK.
Remember that the exposure guide in the manual may not be helpful as it is based on the use of old film with a low ISO value.
So, on a nice sunny day, it's simplicity itself. Just load film and snap away.
Using ISO 100/125 film - shutter speed 1/50s
| Weather Conditions | Shadow Detail | Aperture | Exposure |
|---|---|---|---|
 Sunny SunnySnow/Sand | Dark with sharp edges | f/18 | +2 Stop Overexposed Acceptable |
 Sunny Sunny | Distinct | f/18 | +1 Stop Overexposed Acceptable |
 Slight Overcast Slight Overcast | Soft around edges | f/18 | Good |
 Overcast Overcast | Barely visible | f/18 | -1 Stop Underexposed Acceptable |
 Heavy Overcast Heavy Overcast | None | f/18 | -2 Stops Underexposed Not Acceptable |
 Open Shade Open Shade/Sunset | None | f/18 | -3 Stops Underexposed Not Acceptable |
Photographs taken with this Camera
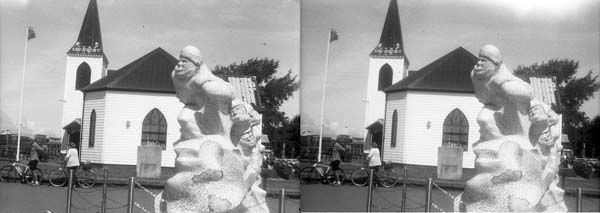
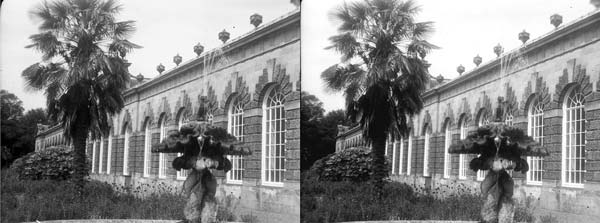
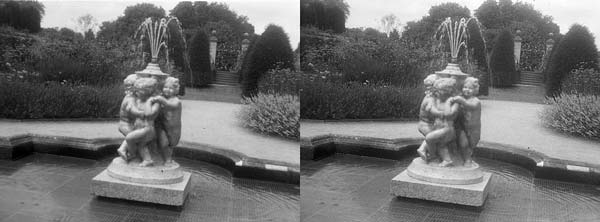
When the negatives are scanned and printed, the images on the negative should be reversed before viewing. The 3-D effect will not work if the images are viewed as they are placed on the negative. To check:- For the right hand image, you should be able to see more of the background just behind the right hand side of a foreground object. Similarly, for the left hand image, you should be able to see more of the background just behind the left hand side of a foreground object. The difference is very slight.
To view the 3D image without a viewer, ensure the 3D photo is about 11 cm wide on your screen or when printed out. Adjust the screen magnification of print specifications accordingly. Look close up, with your nose touching the screen/photo, so you see a single out of focus blurry image. Pull back until you see three images. The one in the centre will be in 3D. Takes a bit of practice.
Film: Ilford FP4+ - 120 (cut down to 127)
